 Corporate
 Log In

These quick start guides are intended to provide developers with simple instructions on how to install SBC-SMART-BEE single board computer from very beginning and have it monitoring your local device in few minutes. No advanced installation options are discussed here - just the basics that will work for 95% of users who want to get started. This guide will lead you through the process of configuring, installing, and developing SBC-SMART-BEE. This guide was written to be as clear as possible and to provide only the details necessary to get you up and running. For more in-depth information, links to other chapters will be located where appropriate.
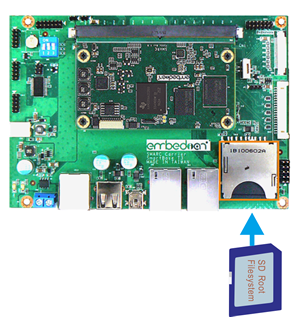
Step 1. Plug a working SD card into SD Slot (CN16)
An image pre-installed SD card comes with the evaluation kit. Plug the SD card into SD card slot (CN16). If developers do not have evaluation kit, please refer to Embedian Setup SD Card to prepare for a working SD card first.
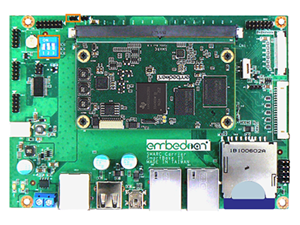
Step 2. Check Jumper and Switched
SW1 switch should be set as SD boot (ON OFF OFF) and make sure that JP3 is not shunt.

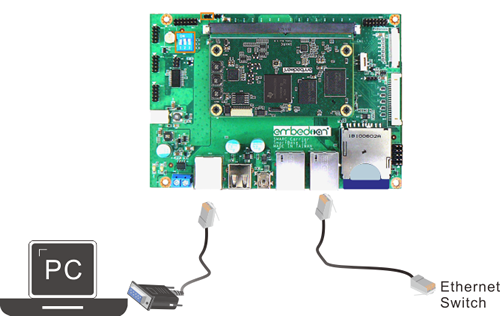
Step 3. Wired the console and Ethernet cable
Connect the DB9 to RJ-45 console debug cable from CN14 of the device to your PC and the Ethernet cable from LAN1 (CN4) of the device to an Ethernet switch. The default Ethernet configuration is dhcp.
Open a serial terminal like Putty in your PC. Set the COM port as 115200, 8n1.
Open a serial terminal like Putty in your PC. Set the COM port as 115200, 8n1.
Step 4. Power 5V to the device
Apply 5V to CN2 connector of the device. If you see the LED light on, that means the wiring is correct. Do not need to worry about the mis-wiring because the device has mis-wiring protection.
If your root filesystems is Arago. There is no password needed for root user. If your root filesystems is Ubuntu 13.04, the default root password is "root" (no quotation) and default Ubuntu user password is "temppwd".
 +886.2.2722.3291
 Email Us
 eniac50